Etsy’s Treasury East: New Feature

Treasuryeast

I got a convo from a fellow Etsian that I am featured in her curated Treasury East. This is the first time I have been included in one, therefore my first time to give it a test drive. I’ve not had the time to curate one myself as of yet, unfortunately.

Treasury East has been rather controversial with the Etsy community. With Treasury Main and Treasury West, you would have to wait for the full treasury to “open up” – when the current treasuries expire – and hope to grab one before they fill up. The treasuries fill up in seconds, and if you are the lucky one to grab one and curate, it is a fun and important marketing tool for many Etsy Users.

The difference with Treasury East, is that they never expire, and comments and the number of treasuries curated will be infinite. This left a lot of Etsy users wondering how they will become relevant regarding promotion and marketing: how will potential buyers see the treasuries and wade through the hundreds – if not thousands of treasuries?

Treasury East is still in the testing stage so these questions will hopefully be answered in the coming weeks. I do see some pros to the new format: you don’t have to wait around for one, and the never expiring element means that you can share it on social network or you blog and it will always be visible. The new format is also larger and cleaner looking. “Hotness” is gained not just by clicking and commenting as before, but gained through promoting outside Etsy, using social networking tools such as Twitter and Facebook.

I don’t know when or if I will curate a Treasury East. But I thank you, riorita for including my turquoise chip earrings! 🙂

Adventures in Brass: Part Two ~ The Initial Project

Brass

My first piece that I made via the brass oxidizing experiment was really, really crude – but it worked up fast. I know my fellow jewelry makers will appreciate the sentiment of just completing a project so that you gain the experience in working with the material – even of the end result is not up to your standards.

The piece turned into two pieces actually – a pair of earrings and a bracelet.

I cut out t he metal using a pair of shears. Then rounded and filed the corners smooth. With a sharpie, I marked where I wanted to punch holes with the screw punch. (You can see another project there on the left working up…for another day. :)). These pictures are straight from the bench, so you see the creative chaos first hand. Sometimes I need to drop what I am doing to develop another idea before I totally forget it. So there are normally many projects on the go at once!

After the holes are punched, I flattened/work hardened the brass using a brass mallet and leather sand bag. Then, the brass pieces were ready for earring assembly…

The completed earrings, with onyx and gold-filled components.

With the rest of the pieces of brass plate, I decided to punch holes – two on each side – and attach together with jump rings.

Sorry terrible pic – but I laid them out staggering the sizes and lightness/darkness from the two brass trophy plates this once was…(and a peek of yet another project in the top right…;)).

Added a magnetic clasp and…there you have it.

These two pieces will be displayed in my workspace as my first ever metal work pieces. I think that it will be neat to see the progression of skill in a few years time. I wish I had of kept the first piece of beaded jewelry I made over eleven years ago! But, I probably sold it! LOL!

Now that I got this get-a-feel-for-techniques project out of the way, my mind is going a mile a minute with ideas. The other projects I am working on involve incorporating the engraver so I am anxious to get them completed and shared. Let’s see how much life gets in the way of play! Stay tuned!

Adventures in Brass: Part One ~ Oxidizing

Brass2

I inherited a lot of trophy brass for my engravers. Besides practicing engraving, I thought I would try my hand at some fun techniques and see what happens. I haven’t had any formal training in metal nor have a worked with it before, other than some crude wire work. I just like to think up an idea and try it out and see what comes of it.

The first thing I did was create patterns on the brass plate using a paper embosser.

Then I needed to rub the surface with a very fine steel wool as trophy plate has a coating to protect it from tarnishing. The steel wool will remove the coating and this is the area that we will oxidize. The effect depends on how much of the coating you remove, but generally, the recessed areas will remain with the coating while the top will not.

The brass oxidizer I have is for the colour black and I got it from an engraving supplier, but is available from many sources including jewelry supply shops. This is an acid so you want to wear gloves and keep out of reach of children.

I used a Q-Tip to apply the solution to my brass plate.

I applied the oxidizer evenly over the surface of the brass plate.

Almost instantly, you will see the brass turn black.

Wipe off the excess…and there you have it. Oxidized, patterned brass. I applied a jewelry wax sealer to the end product.

So what to do with this brass plate? Part two will be the a peek into the projects…

Playing Catch Up…

Babysophie

I am so severely behind with my blog posting. In March, my family & I ended up travelling home to Nova Scotia to attend a funeral. That wiped two weeks out of that month and therefore made me behind on my projects for my “Jewelry Sabbatical“. The 13 hour drive however, gave me a lot of time to think & refocus, and my priorities have shifted a bit. I had a brain wave for the engraving collection, and that is still in conceptual stage while I wait for some logo templates I ordered. I also had a clearer idea about which direction to take the website, so I have been working at updating the look of the site and the overall branding of heavenlyflower.com – all tasks that are severely needed & overdue – I just didn’t expect to be working on that element at all this year! Blame it on retrograde if you must, but these days I just feel motivated to work on getting projects cleaned up, completed and continuing on past goals (like the website). It’s not exactly spending all my live long day at the bench as I had planned, but I am happy with the direction things are headed so I have to go with it. For the first time in 8 years I feel like my goals & dreams are in reach. I tend to go with my gut day to day and this is no exception. Perhaps taking the pressure off this year helped my business goals come in clearer focus. Now to not self-sabotage…a topic I will leave for another post.

I will still be blogging about my new found adventures in creativity as planned however I do have a few topics revolving around the handmade market and business that I will also be writing about as it pertains to what is on my mind these days.

I am also happy to announce that I will be participating in yet another Market Mommy Blog Party next week. Stop by the blog and participate. There will be prizes from fellow mom entrepreneurs as usual. I will be giving away gift certificates! 🙂

Finally: while I was organizing photos I came across this photo of my oldest trying her hand at what mommy does. 🙂 I don’t want them to “hurry up and grow up” but I do welcome the days when I can share my passions with my two girls. This was taken back in October, before my creative space/playroom was finished. She was just newly two years old when this was taken.

The piece I was working on:

The finished project:

More goodies to follow…including my adventures in brass last month!

Come Tour My Workspace…

Workspace

The creative madness (um, I mean, magic…) unfolds in my head. But I have never in the 10+ years of jewelry making & paper crafts had a proper work area to transfer those ideas into the tangible world. I’ve always lived in apartments for my whole adult life; and when we bought our house 3+ years ago, two children have been born since so I have been working from the kitchen table. 🙂

As summer drew to a close and my youngest was gaining independence, I decided it was time for a proper workspace. But what would work? Where? I needed a place that I could multi-task: make jewelry, fill orders & prep them for shipping, take photos (I was so sick of setting up and tearing down my photo box), and also work on my other creative endeavours which include cosmetic making, paper crafts, candle making…on top of this, I needed a way to keep the girls occupied while I work. So the space would also have to act as a playroom.

Upon pondering on my open-concept home, it became clear that one room would be perfect: the laundry/mud room.

What? You say. A laundry room. Sounds silly doesn’t it? Here is where ” outside the box”  creative thinking is key.

Our laundry room is very large. In the initial plans for the house, it was supposed to be three smaller storage rooms and an exit to the garage. Thankfully, the original owners opted to make it one large back room. Prior to last August, this room served as a laundry room and very large bathroom for my cats; and because the kitty litter was there you really did not want to spend a lot of time in it, let alone have babies crawl all over the floor.

My husband had plans to move his computer gear into that room as well, so a plan formed. Cat litter was moved out of the room entirely. One side would be set up with carpet tiles so the girls could have a play area. The other side, my desk/work station. The room was already equipped with lots of cupboard space and counter space which would house all my creative products. And bonus – I could also get the laundry done as well! Perfect solution for a busy mom who rarely made it down the stairs to do the laundry…

In October we set up the space; and I did some more organizational arranging last month when I realized I was going to take a jewelry sabbatical.

The space esthetically is nothing to shake a stick at: I do hope to do some painting and refreshing in the future. Functionally however, it is a dream come true.

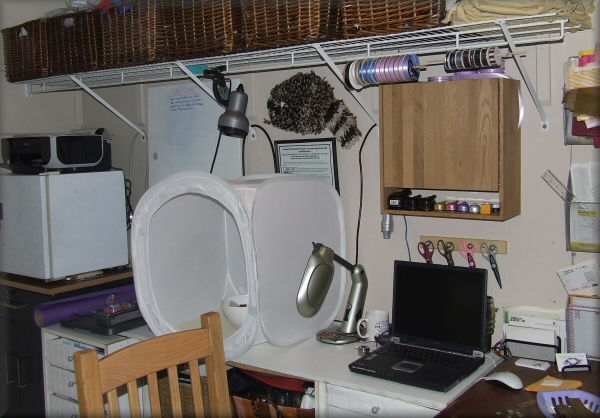
Above is a view of my main workspace. We have three of these flea market tables and one works well for a large work area. The other desk/cabinet was here when we moved in; not great looking but it’ s free and functional! You can see my shipping materials in the hanging file above the table. My light box for photo taking is in the middle and that small fridge at the very left keeps any cosmetic concoctions or supplies that need to be kept cool (and my husband’s beer!). See those two carpet tiles missing at the top left of the carpet? Spilled beer. Sigh. They will return after we can get the smell out. LOL!

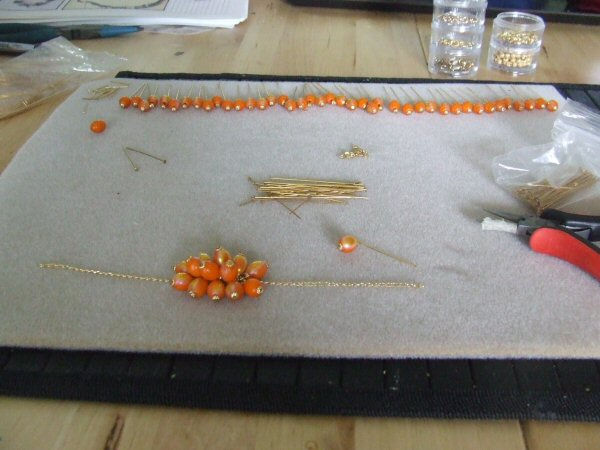
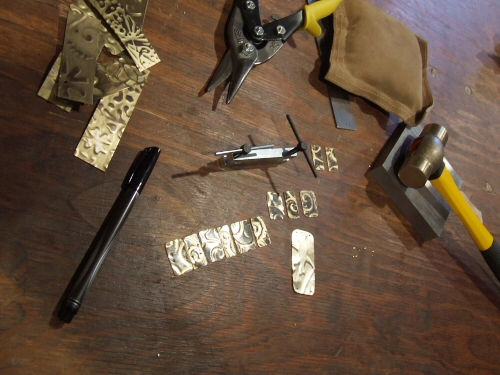
The fridge sits on my cart that holds my “hardware”: metal working materials, polishers and all of my engraving fonts. I also have a printer that comes in handy when I am not at my usual computer.

And of course…my daughters’  toys…they never stay in one area. 🙂

The above view is of the entrance to the room. My work area is directly behind me. You see my oldest on her slide on the right. My washer & dryer that I adore; and the cupboards above are great places to stash my supplies for making cosmetics, their packing materials and misc. supplies such as mixing bowls, the ever useful Popsicle sticks, etc. That blue thing on the floor is a tunnel in case you are wondering. Endless fun for babies. 🙂

A view of the play area. There are lots of baskets and bins to store their wooden blocks, musical instruments, and pretty much any toy that I don’ t like to have under foot in my living room. 🙂 That cupboard is where I keep my beading supplies and craft paint; we’ll get a peek inside shortly.

Inside my jewelry cupboard…at least the beading side of it…still room to grow! *grin* It could be neater but it will do for now.

My very useful “built-in” bookshelf that holds paper,  books, jewelry (those two large binders on the right of the third shelf houses my completed jewelry ready for shipping), my engraving plates and charms in metal and wood, and that wooden case is where I keep my hole punches and rubber stamps.

I found this scrapbooking cart at Costco awhile back & although I do not scrapbook, it’s handy for holding all my decorative paper! On top is my Provo Craft Cuttlebug.

The room also came equipped with ample counter space. Here in one corner is my microwave for flower pressing & melting soy wax for candles.

Above the microwave you see my main cupboard filled with cosmetic making supplies. I haven’t delved into making mineral makeup as of yet; just soaps, lotions, scrubs, lip balms, etc etc….

This is a fairly messy end of the room…but I wanted to show two of my three pantograph engravers….my husband’s computer gear is to the left of them (that’s our router stuck to the wall) and recycling bins underneath…it’s a hot mess at the moment so I’m only showing off the engravers. 🙂

Here’s a closer look at my workspace…the wicker baskets above hold remnant fabric, candle making supplies (mostly holders), extra shipping materials, and packing supplies. I use my old laptop downstairs if I ever want to look up something on the internet or get info off our server. That little box on the wall was a great find! I forgot to take a photo of the inside…but I got it at Ikea for half price. It is supposed to hold CD’s, but I keep my inks, pigments, embossing powders, glitter & stamping pads in it. Robbin is kept neat & accessibly hung on dowels and wire off the top rack.

(That hook rug raccoon was a creation of my late mother’s when I was a child. It always makes me smile to look at it).

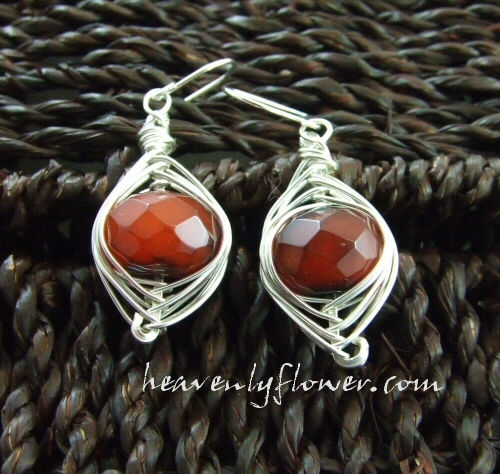
This little photo box was such a great, inexpensive investment! I still believe natural light is the best light for photographing jewelry, but if I waited for great weather to take photos outside in this climate I would be unable to take photos year round! My photos still could use work but they have improved dramatically since buying this light box.  Underneath I keep props for photos as well as other jewelry making materials.

It’s always great to have a whiteboard to stay organized and brainstorm! Mine is under-used this month; I must remedy that next month.

Thanks for taking a peek at my workspace…it may not look like much, but my girls & I love to spend our time down there. Hopefully it will inspire you & your creative space however big or small!

Clasp-o-phobia: Getting over my fears ~ a review of Bali Silver Clasps.

Onyx

For December, Artbeads offered through their Blogging for Beaders program the opportunity for us to try products from their Bali Bead line. Upon reviewing my choices, I decided to try & review the clasps.

You see, I am self-diagnosed with clasp-o-phobia: the fear & doubt of the functionality of most clasps on the market. I have tried different clasps in the past, including barrel clasps, toggle clasps, “S”-clasps, hook & eye clasps, etc…but none really impressed me or gave me a sense of security. I am one who hates the frustration of doing up clasps on bracelets, and also the feeling of a clasp that may become undone during regular use.

So because of this, I have stuck to using two tried and true clasps: the lobster clasp and the magnetic clasp. Although the lobster clasp can be tricky to get latched at times, the security you get from knowing that it is not going to come undone makes it a winner in my books. It’s a clasp we are all familiar with, and can be used in adjustable bracelets and necklaces.

The magnetic clasp is a dream for us who hate to fiddle with clasping bracelets. The worst thing that has happened is it accidentally pinching my skin if it was too close to my wrist when the magnets come together. I also like to include a safety chain with magnetic clasps in case they become attracted to another metal object and possibly come undone.

So when Artbeads offered the opportunity to review items in their Bali line, I thought this was a good chance for me to overcome my clasp-o-phobia. Many of the Bali clasps are very ornate and add beauty to the piece. I also know from past experience with Bali products that they are sturdy & well made.

As you can see I am a bit late with December blogging due to the holiday rush, but here are the finished pieces inspired by the Bali clasps…

The first clasps I wanted to try were the toggle clasps. I immediately noticed how ornate & well crafted they were: very sturdy – great for big stones that I love to work with! They also had chain already attached which I appreciated. In the past, the sterling silver toggles I have tried did not contain a chain, and for me to add one was trial and error – sometimes too long, sometimes too short. These totally took the guess work out of it!

Above: toggle clasp with wire loops paired with 16mm faceted quartz & 12mm reconstituted smoky quartz beads.

Above: square beaded toggle clasp paired with large aquamarine nugget beads.

The verdict: I *LOVE* these clasps…who knew the functional part of a bracelet could also be a focal point! Very easy to put on and pair well with large stones. You will probably find when buying a bracelet with a toggle clasp you will appreciate going up a size so to have room to maneuver the bar piece through the clasp. For example I usually make my bracelets 7.5 inches – the common ladies wrist size, but these are approx. 8 inches. I don’t think I could comfortably get them on if I made them the standard 7.5.

Next I tackled designs around the “S”-clasps. At first, I found these clasps very frustrating. Again very sturdily designed, and very beautiful…but since they are made out of such a strong gauge of wire I found them very hard to get clasped & undone. Some slight manipulation with the pliers to loosen the “S”  part slightly, and success! A beautiful clasp that was fairly easy to use. A good shake and it was clear that these were very well designed: I was not worried of it coming undone accidentally.

Above: “S’ Clasp with double wrapped and snaked wire paired with square faceted onyx beads and pewter bead caps.

Above: “S” Hook Clasp with granulation & wire work with faceted onyx coins & pewter bead caps.

Finally, I tried the hook & eye clasps. I want to comment separately on these since all three were so very different.

I was really excited with this Simple Hook & Eye Clasp. This large clasp works perfectly with larger stones, as seen above with 16mm red banded agate beads. Because of the size it is quite simple to use.

The Hook and Eye Clasp Set is the polar opposite of the previous clasp. Very petite and great when you want a clasp that is inconspicuous. It works beautifully with the bracelet above showcasing 6mm South Sea Shell Beads in Sterling Silver. I was happy to find this clasp very easy to use – definitely a good alternative to the lobster clasp and I will be keeping this one in mind for future adjustable pieces as well.

I decided to use the Triangular Hook & Eye Clasp last. I had a hard time deciding what to make with it, considering its design. I found it rather awkward to use. Although it was my favourite clasp esthetically, it was my least favourite in terms of usability. When I finally decided to make a three-strand sterling silver & onyx bracelet with it, I really had to bend the hook part out with my pliers in order to get the clasp undone & easily done up. Because of this I added a safety chain. But to be honest although it takes some practice to learn how to use this clasp, it wasn’t so bad in the end. And it looks fabulous!

For 2010 – Free Gift With Every Purchase

Due to the success and positive feedback of my “free earrings with every purchase” holiday promo, I have decided to give a free gift with every purchase for 2010. It maybe a pair of earrings, a gift certificate for $5 off your next purchase (or pass it along for a friend to use), a beaded bookmark or hair pin…the fun is that you never know what you are going to get, but because it is from heavenlyflower.com you know that it will be quality!

Happy 2010 everyone…I am embarking on a new journey I am calling my “jewelry sabbatical” ~ new equipment and supplies are on its way and I will be blogging about it so you can take the journey with me. Hopefully we will be inspired together!

Fundraising Inspired: Elly’s Pageant Fund

Sweetheart

I’ve always enjoyed donating my jewelry for silent auctions and door prizes, but it has always been a goal of mine to host fundraisers on my site.

The basic idea is, a particular piece of jewelry will be designed and listed specifically for a grassroots or community cause. A percentage of the profits would then go to the individual or group.

So when I found out Abby was looking for donations or corporate sponsorship for her 12 year old daughter’s pageant in March, I suggested we do a jewelry fundraiser. I know Abby from back in my pen palling days, and we recently connected again on Facebook. Pageants are something Elly asked to do, and it’s not a cheap hobby for this mom of four.

So that kicked my butt into action. As usual I work on impulse: having a light bulb moment and just…going for it. My website is slowly coming together, but in pieces. I don’t even have the framework to sell jewelry set up on my website yet, which is why I use Etsy & Artfire.

The first order of business, was what type of jewelry to make for Elly’s fundraiser. I decided that earrings would be a good option as I could set them at an affordable price point. I found out from Abby that Elly likes pink, and she is a big Taylor Swift fan. I had some recently designed pieces for my new custom section on Etsy that I thought would be a good fit.  I was not surprised as to what her favourite pair was.

I decided to set her pair at a special wholesale price to encourage sales and give her $5 per each pair sold, donating my time to the project. I also did a pendant version of the earrings:

I decided to use Artfire to host the fundraiser. Basically because they do not have listing fees, justifying the lower price, and that you do not have to sign up to use the service like you do with Etsy. Also, Artfire now has integration with Amazon Wishlists!

You can check out more on Elly’s fundraiser here:

Would you like me to host a fundraiser? Check out my fundraising section of my website, and see if my philosophy would be a good fit for you.

Jewelry Inspired: Fun With Swarovski Filligree Flowers

Sunflower

Artbeads allowed me to pick out some Swarovski components to try out free of charge. I decided that one of the items I wanted to try were these Swarovski Filligree Flowers as I had not seen this type of component up close & personal before. When it arrived, it certainly lived up to the standards I have come to expect from Swarovski: solid design and the crystals sparkle beautifully.

At first I didn’t know what to do with it. The flower itself has a very vintage feel, so it is unlike my usual modern funky design. It has such an elegant yet bold factor on its own: paring it with stones and beads just made it feel very busy and over done. I realized that this component on it’s own would make a very nice piece: like a nice brooch or earrings…then it hit me. I immediately had to purchase more from Artbeads, because these would make the perfect hairpins!

I usually shy away from making this type of jewelry because there doesn’t seem to be any challenge design wise. Glue the component onto a hair pin. Okaaay…now what? Seems very uninspired for someone who wants to inspire & be inspired.

But when the order arrived from Artbeads with my extra Swarovski flowers I knew I made the right decision. I can totally see these as hair adornment: perfect for a bridal party, the prom or any formal event – or even just to jazz up your hair any day of the week.

And remember when I said this would be not very challenging? I was left scratching my head when trying to decide what glue to use. I have just about every kind of glue you could imagine for jewelry making or crafting. I decided the best glue for this would be Zap-A-Gap: it’s like Super Glue, but also waterproof & will adhere to any surface, even oily ones, and dries clear. Seemed pretty fool proof.

Only it was slightly tricky. I had to find just the right pressure to hold the component onto the hair pin and keep it really straight so that it would adhere evenly. I did not want to use a clamp or tool for this in case it damaged the Swarovski component. So it was a little tense & frustrating to start out trying to decide how much pressure and for how long to hold…and not glue my fingers to it! 😉

But once experimenting with one the other three worked up quite quickly.

I was excited with the results. The glue cured for 24 hours and this is one solid unit.

I decided an elegant pair of earrings to go with these were in order. I simply paired them with 8mm freshwater pearls, antique gold culinary grade lead free pewter bead caps and gold filled ear hooks….

Remember that original component Artbeads sent me that inspired this whole project? Well, I made a ring out of it, glued onto an adjustable filigree ring base:

I am really impressed with how this project turned out (and am now totally hooked on Swarovski flowers!!) and will definitely be offering this on a by request basis on my website. Stay tuned!

Jewelry Inspired: Sparkly Reconstituted Smoky Quartz…

Amber

Expanding on yesterday’s post, that lately I have been working with colour themes, I now introduce you to one day’s project: fun with reconstituted smoky quartz. Essentially, these are glass beads that contain particles of smoky quartz. So yes, they are “just” glass but are they ever so pretty! I don’t purchase a lot of glass anymore but when I saw how these faceted beads danced under the lights I had to have them. They are a nice size too – 12mm, so they really make a statement.

Initially, I set out to make one of my signature chunky bracelets. However, as the piece evolved it became clear that it laid better across the neckline than on the wrist. And so, voilà – this piece was born:

NLE148 (1)

NLE148 (3)

Unfortunately, my photography skills do not do it justice. It looks and feels like a million bucks on. This is probably due to the heavy sterling silver dot dash chain, as well as the 22 gauge sterling silver wire each bead is affixed on the chain with. I also made sure to make it adjustable length wise so that it could be worn in different ways: choker style or longer. I love how it looks and feels on –

I was really, really tempted to keep it for my own personal collection!

If you can imagine, this was a fairly labour intensive project, so I finished up my adventures in sparkly amber coloured bead land with two elegant and tasteful pairs of earrings:

ELE098 (1)

ELE098 (5)

ELE099 (1)

ELE099 (5)

That was fun! I am really hoping to find time to do more projects like this!

Jewelry Inspired: Aqua Blues…

Aqua

So the other day I had the opportunity to have an adventure in sea blue – or aqua blue as these particular beads are properly called. I currently have dyed quartz and fiber optic cat’s eye beads in aqua blue. I have beads of all colours of the rainbow in the cabinet…so I love to get requests for specific colours to work with esp. if it is one I have not touched in awhile. I mean really, do I need an excuse to get creative? Twist my rubber arm…

Check out these dyed faceted quartz beads paired with sterling silver hoops. I tell you, the pictures do not do these babies justice: so pretty and sparkly!

ELE101 (1)

ELE101 (5)

I also have many round 4mm dyed quartz beads. Kind of boring, you know? So I had this idea to wrap them around some memory wire  – the bracelet size – with 24ga sterling silver wire to make a fun & funky hoop earring. I have not worked in memory wire in a long time, & due to the success of this experiment I think I will be doing more projects using memory wire in this way. I can also see making some cool pendants & such as well, not just earrings!

ELE100 (1)

ELE100 (3)

The hoops face back-to-front when you wear them – just like a normal pair of hoop earrings. I decided to put them on sterling silver French ear hooks (earwires) for comfort.

Finally, I really love the look of this hue of blue with white, so I wanted to make a dangly pair coupled with a freshwater pearl accent…and here you have it: 4mm dyed quartz, fiber optic cat’s eye beads and 5mm frewshwater pearls on sterling silver:

ELE102 (1)

ELE102 (4)

It was really fun to work with this colour amongst all the Fall colours here in Québec…really makes me long for white sandy beaches and turquoise seas! 🙂

The Gift of Re-Gifting: heavenlyflower.com’s Holiday Promotion

Re-gifting. You can’t tell me the thought has never popped into your head. You receive a gift that really, is perfectly fine but just not your personal taste or style.

So, I decided to give you my re-gifting blessing! Every purchase from my Etsy Shop or Artfire Studio will receive a gift from me.: A free pair of earrings. You can keep these handmade artisan earrings as a gift from me to you, or use as a gift for someone on your holiday shopping list.

The earrings will be made of good quality materials: either sterling silver or gold-filled ear hooks, hand-painted cloisonné beads or semi-precious gemstones.  ANY PURCHASE qualifies. Just my way to say thank you and to give back. I know there is always someone on that list you’d like to give a little something to that maybe the budget doesn’t allow.

As always, there is free shipping worldwide on all items! 🙂

The promo is currently on and will continue until January 11th, 2010. You will automatically receive a pair with your purchase.

Jewelry Inspired: Fire Agate in Sterling Silver ~ Finding Creativity Again…

Fireagate

I sold my “Day of the Dead” earrings,  so I wanted to make something in replacement. I was drawn toward these faceted fire agate beads that I picked up at a Gem & Mineral Show this summer. Not exactly falling into the category of, “leftovers” but  I have been jonesing for some true creativity & inspiration lately, so I’ll take it wherever it appears!! 🙂

This always happens when I go away. While on vacation, my mind is turned on. I get lots of ideas for marketing, photography backgrounds…what I would like to make and designs…however when I sit back down at the bench my head and hands just don’t seem to be communicating. What we got here is (a) failure…to communicate… 😉

So earlier this week I sat down with the beads and some sterling silver wire. I knew that I wanted them wire wrapped, that I wanted them to be somewhat free formed and more rugged/edgy than elegant, certainly not  “perfect” – but would have a universal appeal and style. I tried a heavy gauge square wire. Then a  heavy gauge round wire. Both attempts ended up in the scrap pile. I found myself digging out the bead caps and making a simple yet beautiful pair of fire agate earrings…

The only problem is, it nagged me all night and into the morning. It’s not what I wanted to do – at all! Although they looked great it wasn’t what I was going for. So out came the nippers and cut cut cut…I dismantled them. I could have gotten two more beads out of the stash but – these were the ones I wanted to work with. So with determination I sat down again. This time with a 20 gauge round sterling wire. I was amazed at how fast and easy these worked up:

ELE097_1

ELE097_2

These earrings were such a joy to make. They were truly meant to be. They also reminded me to never give up – and to never settle. The creativity will come back…it always does… 🙂

$175 in Jewelry to Give Away…the Final Countdown is on….NOW!!

ARE YOU READY?! This is the official announcement: we will be drawing the $100 Jewelry Giveaway NEXT SUNDAY (Oct. 11th) at 11pm EST!  This is your final chance to get your entries in to win this fabulous prize. Three lucky winners will get to choose $100, $50 and $25 in FREE jewelry from my Etsy & Artfire shops! The response has been AMAZING and  will be drawing next Sunday whther or not we reach 1000 entries: but we are going to come pretty darn close!

Go here for the official rules and announcement: The Great Jewelry Giveaway Contest

I am so incredibly touched and pleased by your responses and support! Best of luck to all and I am so excited to see who wins next week!!

Rockhound Wannabes in Bancroft

Bancroft

DSCF1291

I was fortunate enough to travel to Ontario Cottage Country in order to attend the 46th Annual Rockhound Gemboree in Bancroft. My husband & I are rock & minerals geeks but are very green when it comes to rockhounding. It’s definitely something we want to make a family activity. We met some wonderful encouraging amateur rockhounds & look forward to getting out to the field once the children are a bit older.

DSCF1430

DSCF1458

Bancroft is the Mineral Capital of Canada and the show did not disappoint. Two buildings plus an outdoor area filled with jewelry making supplies, specimens, info on rock hounding & many talented artists from jewelry makers to stone carvers. We did the full show: 4 days and we were never bored. We actually felt a little sad when it drew to the close on the 4th day. We Definitely will be back next year. Staying at a cottage with no electronics was also so clearing for the mind. My cell phone didn’t even work. We were just able to sink in and enjoy the natural beauty the area had to offer despite all the mosquitoes (thanks to a rainy summer!).

DSCF1268

DSCF1304

Besides jewelry making goodies we also picked up several wonderful specimens. Our favourite place to buy was from the amateur rockhounds who set up shop in the sweltering heat outside. Not only were they wonderful quality, but it carried so much meaning to us to acquire pieces that were collected by such passionate individuals. We had a collection of a few specimens picked up over the years, mostly from our days in Nova Scotia attending the Parrsboro Gem & Mineral Show. But after the haul of goodies we obtained from Bancroft, it was time to set up a display case so that we could enjoy our finds all in the same place.

DSCF1460

DSCF1466

DSCF1469

DSCF1472

Dare I say – our collection is TOO BIG for the display cabinet!! Next year, we will have to look at acquiring another one…

I would share here some of the jewelry making materials I acquired, but 1) the photos were pretty bad and b) it’s more fun to let the creativity flow & share the treasures through design! Stay tuned!

My Black Cat Anklet featured on The Grand Design Blog

I am honoured that CJ Grand of  The Grand Design chose my black cat anklet as today’s Handmade Tweet on her blog. She has some absolulely stunning work featured from many different artistic mediums. Go check it out & get inspired (and drooling!).

heavenly flower Featured as Shop of the Week Bejeweled’s Jewelry

Thank you Lisa Holley for featuring my Etsy Shop as the shop of the week!!

Bejeweled’s Jewelry: All My Friends on Etsy

(on a side note, I should be back to blogging shortly. I got side tracked with web design & a new venture hopefully launching shortly there after…so many ideas, so little time…)

Finding Inspiration…

Inspiration

Newton’s first Law of Motion: “An object at rest tends to stay at rest and an object in motion tends to stay in motion…” So too does this apply to inspiration. I found myself  “stuck”  as of late to get jewelry making again. Out came the supplies & I sat down…but nothing came to me. No inspiration. I’m into jewelry making for the expression: the creative outlet; not just to mass assemble pieces for sale.

Over the 12 years that I have been making jewelry, I know a thing or two about finding inspiration for my art form. I was foolish to think I could just sit down and start again after a 10 week hiatus! So here’s what I do to get myself inspired again:

1. I get organized.

Regardless if you make jewelry, paint, knit, sew, etc., your supplies are bound to get messy despite your best attempts to keep it neat & tidy. We wouldn’t be creative individuals without a bit of chaos thrown in! So I take some time to sift & sort through supplies. Sometimes an object just needs a new place in the storage containers or on the workbench in order for it to spark some creative juices. Touching & feeling the textures of the medium you work with (for me it’s mostly semi-precious gemstones) can also kick start the process.

DSCF0498

2. I go shopping.

Whether your budget is big or small, buying new supplies or simply browsing at your LBS (local bead shop)/supply store can be a wealth of inspiration. It also keeps you up to date with what’s new & exciting. Besides this, I like to window shop at the local mall. The window displays tell a lot about what’s “hot” for the season.

DSCF0385

3. Check out the trends online &  in magazines

This is a given, I know. For jewelry making, I like to check out the trends by browsing online jewelry shops, or department store catalogues. It’s also great to read trend reports on fashion sites. I tend to shy away from actually making anything based on trends, but it still serves as inspiration. Checking out what other talented artists in the handmade realm are making aids in finding creativity for me. Not just the jewelry, but the handmade goods on sites like Etsy & Artfire are sure to get the ideas flowing.

4. I look around me

Absolutely, hands down, the best form of inspiration is my environment. Whether it be the colours & textures of my children’s clothing, the vibrant colour of a fresh salad straight from the garden or the mixture of my own personal decorating style around the house. All these things serve as the best inspiration of all, because it is something intimate to me, that is easily relatable. Working with what I know helps my creations evolve with a sense of ease, & doesn’t end up looking forced or mechanical.

The change in seasons is a huge help as well. I am someone who is drawn to nature well, naturally! I think we all are in one way or another. Maybe you like to sit and meditate or read outdoors, go hiking in the woods, plant in your garden or play a seasonal sport. I know for me, this time of year the flowers in full bloom & the lush green foliage acts as a catalyst for me to create jewelry pieces that are vibrant & alive with colour: turquoise, orange, yellow, etc. I have some magnificent orange dahlias blooming out front that serve as the inspiration for my current work in progress.

5. I look at what the birthstone of the month is

Most of my jewelry is based on the metaphysical properties of stones, so I enjoy making jewelry themed around birthstones. This helps give me a benchmark as to where to begin. For example for June, I could concentrate on making pieces featuring pearls & moonstone to help get me going. Even if you don’t make jewelry, the colour of the birthstones may help give you a place to start your knitting or embroidery.

6. I Draw

I can barely draw a stick person mind you, but this is all the skill that I need to record any ideas I may have. As I become more aware of my environment in a creative sense, I will get flashes of ideas. It’s great to put them down on paper for future reference. It sounds cliché but a pad of paper & a pen by your bed really is a must. I can’t tell you how many times I have had brilliant design ideas just as I am nodding off to sleep or waking up, only to forget them later when I have the chance to actually put those ideas to use. Right now for me the best time for ideas is as I put my girls to bed. I lay down with them until they fall asleep, so this is great time to just close my eyes and think. I then draw them out on paper once I am free to get up & start my evening.

DSCF0634

Of course some of my favourite pieces have been created out of spontaneity, and following the steps above I believe can help you create unique items regardless of what your creative medium happens to be. What are some of the ways you find inspiration? Happy Creating!

DSCF0492

Getting my Groove On…

Groove

Well it’s offcial. I sat down last night I finally made my way back into jewelry making after a 10 week hiatus due to the birth of my second daughter. I am elated, because the hiatus was more like, one year after my first! It was just a couple of pairs of earrings but it was enough to get the creativity flowing & have the ideas come rushing forth. Here’s what I’m working on today, I think I’ll call it, “orange crush”:

DSCF0584

They are vintage orange beads with a gold AB finsih on one side. I got these at an online aution get this – over 11 years ago!!! Yep. I thought they looked cool but in over a decade I was at a loss as to what to do with them. I’ve been hanging on to them ever since: something about them told me when the time was right, I would use them. Trust me, there have been many time when I have considered destashing them or giving them away! Stay tuned for the finished piece…